When people find out that my boyfriend is from South America, they often want to know if he has a sexy accent. Unfortunately, I’m not sure. When we first met, his voice definitely seemed different. But now that we’ve been together for a while, I don’t notice any accent. His voice is just his voice.
Since I’m not with the guy for his accent, I have had to find other benefits of dating a foreigner. That’s become Ecuadorian food. Xavier doesn’t cook much, but when he does, he knocks it out of the park. For one, he makes the best fried eggs I’ve ever had. And he’s been known to make tilapia with a lime-onion sauce, which is just awesome. But mostly, I have been trying to learn his comfort foods. I started with something that I loved eating in Ecuador: locro de papas, which is a potato soup loaded with avocado and cheese. (It is even better than it sounds!). Next came something that I’ve been promising Xavier for years. The boy adores empanadas, and I promised to make some for him. But for some reason, they eluded me.
I was a little nervous about tackling empanadas because I didn’t know where to begin. An empanada is not a universal thing. There are as many kinds as there are types of sandwiches! Seriously. You can make the pastry shell out of almost anything. Flour, corn, rice, or even green plaintains. The filling options are similarly endless. You can go sweet, by using fruit or fresh cheese. Or you can keep things savory with meat and olives. Or you can mix the two! A popular Ecuadorian empanada is stuffed with cheese, but dusted in sugar after it’s fried. Xavier had his heart set on meat empanadas. I couldn’t find any that looked good. Most incorporated things I don’t care for, such as olives.
Fortunately, my future sister-in-law saved the day. I sent her a Facebook message and she replied with a recipe for empanadas de carne, or meat. It was in Spanish, so I clarified a couple of things with Xavier so we could make these to the letter. The results were excellent. I can assure you, although they might be somewhat traditional in South America, olives are not missed.
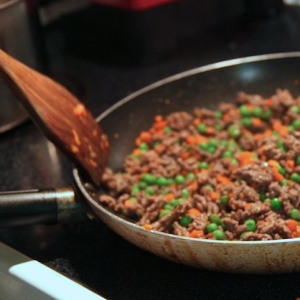
If you’ve never made empanadas before, there’s a little bit of an art to it, but it’s simple once you find a rhythm. Before you do anything, make sure you have some white rice on hand. You can quickly throw a little on the stove to simmer, or just have leftovers. Meanwhile, you’ll saute a mixture of ground beef, carrots, peas, and spices.
When the beef is browned, reserve the mixture in a separate bowl.
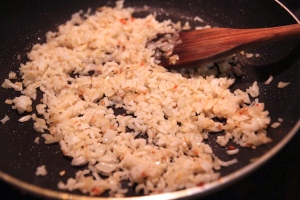
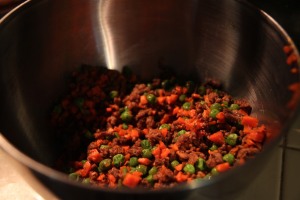 Next, you’ll saute garlic and onion together until they’re soft. You’ll add rice to this mixture, infusing those grains with tons of flavor.
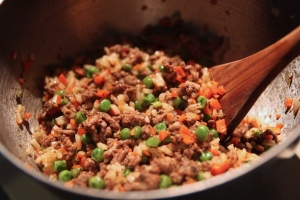
Mix all of that together with the beef. There’s your filling.
Okay, here’s where things get interesting: assembly time! The easiest way to do this is to set up a workstation. I use a cutting board. Have a sheet pan ready for your finished empanadas. I’m right-handed, so I use that hand for scooping filling, folding pastry, and crimping. My left is just support. Have a bowl of egg wash and a bowl of filling handy.
Working with one at a time, place an empanada shell on your workstation. Use your fingers or a pastry brush to paint the edges of the circle with egg wash. Moving quickly so the egg stays moist, place filling in the shell. I try to keep the meat towards the shell’s center, but it’s easier said than done.
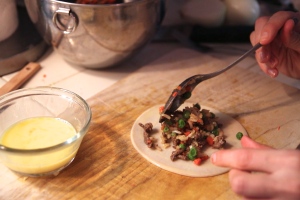 Carefully fold the pastry in half, keeping the filling away from the edges. It may take some practice, but once you get used to the motion, it’s easy to keep things tidy. Use a fork, if necessary, to poke and prod filling back inside.
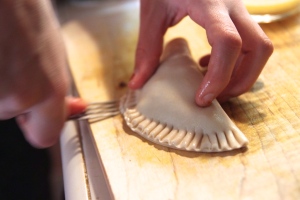
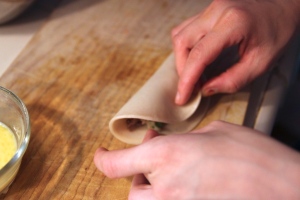 When things are folded nicely, use the ties of a fork to press the pastry’s edges together and crimp them decoratively. You could skip this step, but I think it does a great job of sealing the empanadas while making them pretty.
When they’re ready to go, brush them lightly with the remaining egg wash. That will help them turn shiny and pretty in the oven. Yes, these are baked to keep them on the healthy side. Look how cute they are, ready for their tanning session!
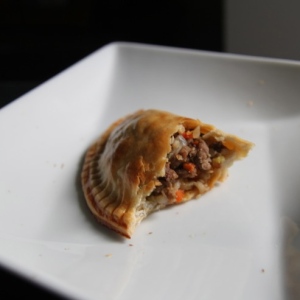
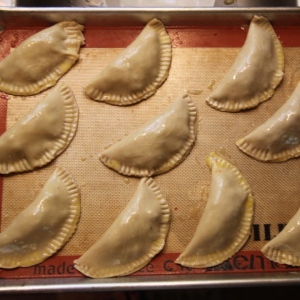 They will emerge about fifteen minutes later, golden brown and crunchy outside, with tender filling within.
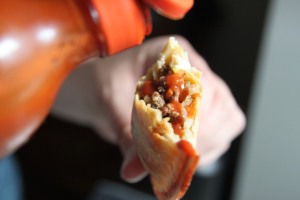
Bite one open. If you like things spicy, pour some hot sauce inside. Enjoy.
 You could call these authentic Ecuadorian empanadas, because they came straight from Ecuador. But it’s important to remember that anywhere you try empanadas, they’ll be made a little differently. This is our version. I think the important question to ask is, are they good? Are they worth it? Well, I wouldn’t want to embarrass my Ecuadorian by disclosing how many of these he ate. Let’s just say yes, and yes.
Empanadas de Xavier
15 medium empanada shells (until I master these, use this Ecuadorian blogger’s recipe)
2 tablespoons vegetable oil
1 carrot, chopped finely
1/2 pound lean ground beef
1/2 teaspoon cumin
1/2 teaspoon dried oregano
1/2 teaspoon paprika
1 cup peas, shelled if fresh or frozen
1/2 onion, minced
2 cloves garlic, minced
1/2 cup white rice, cooked
1 egg, beaten
In a saute pan over medium heat, heat 1 tablespoon of vegetable oil until hot, then add the carrot. Saute until soft but not browned. Add the beef, salt, cumin, paprika, oregano, and salt to taste. Cook until browned, using a wooden spoon or spatula to separate the chunks as finely as possible. When browned, add the peas and allow the mixture to cook together. Remove and place in a bowl that has some extra room.
Now would be a good time to preheat your oven to 400F.
In the same pan, add the remaining oil, the onion, garlic, and salt to taste. Saute over medium-low heat until the ingredients almost melt into one another. Add the cooked rice to the pan and let it all cook together for a couple of minutes, stirring occasionally to mix things up. Add this onion-rice mixture to the bowl with the meat. Mix it together.
Take your empanada shells and fill them according to the photos. Working one at a time, moisten the edges of each shell with a little egg wash. Spoon a heaping tablespoon of filling into the middle. Fold the shells in half, using the tines of a fork to seal the edges.

